Often I hear from friends: “VSCO – what is it and how to use? “. VSCO is a photo editing application on a mobile phone. Often, even if you wipe the camera and taking pictures with good lighting, processing is needed to get a good shot. And for promotion on Instagram beautiful Photos are a prerequisite.
One of the most popular photo processing apps is VSCO application. And the popular hashtags #vsco #vscocam set, when it is processed in VSCO.
Better processing can be done by editing first. photos with manual settings, and apply VSCO filters on top. But settings often seem too complicated, and filter by process quick and easy, let’s start with filters.
- Download VSCO
- How to start using the VSCO application
- VSCO Filters: how to use
- VSCO A4 Filter
- VSCO A5 Filter
- VSCO A6 Filter
- VSCO C1 Filter
- VSCO HB1 Filter
- VSCO: how to use the settings
- VSCO:Exposition
- VSCO: Contrast
- VSCO: Straighten
- VSCO: Tilt Horizontal / Vertical
- VSCO: Sharpness
- VSCO: Saturation
- VSCO: Light and dark areas (Highlight, Shadows)
- VSCO: Temperature
- Hue
- Flesh color
- Vignette
- Grain
- Discoloration
- Light shadows
- Light highlight
- How to use VSCO settings correctly
Download VSCO
For Android —https://play.google.com/store/apps/details?id=com.vsco.cam&hl=ru
For iOS (IPhone, iPad) —Https: //itunes.apple.com/en/app/vsco-cam/id588013838
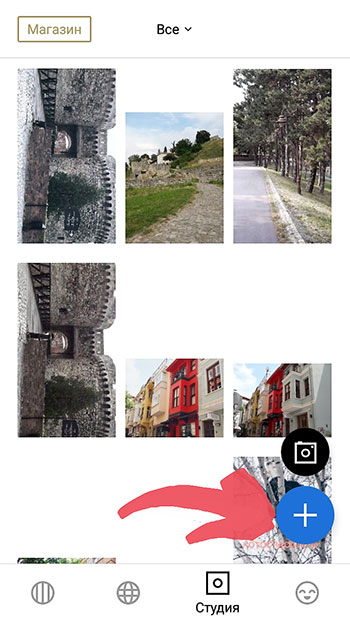
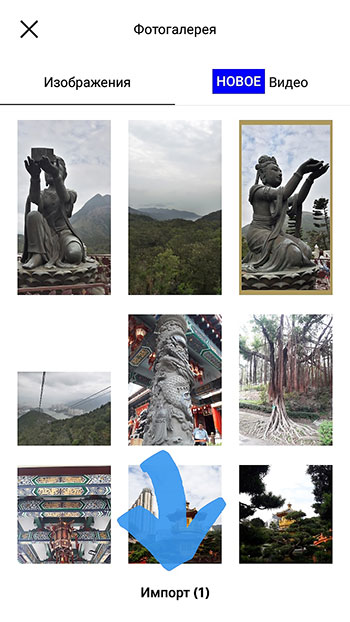
How to start using the VSCO application
First you need to upload your photo. At the bottom of the screen, click “Studio”, then a blue plus sign. A gallery will open with all your photos (if the application asks for access to photos – allow). Select the one you need (or several) and click “Import” below screen.
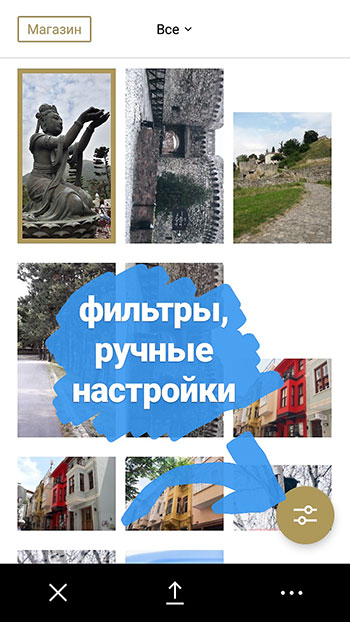
VSCO Filters: how to use
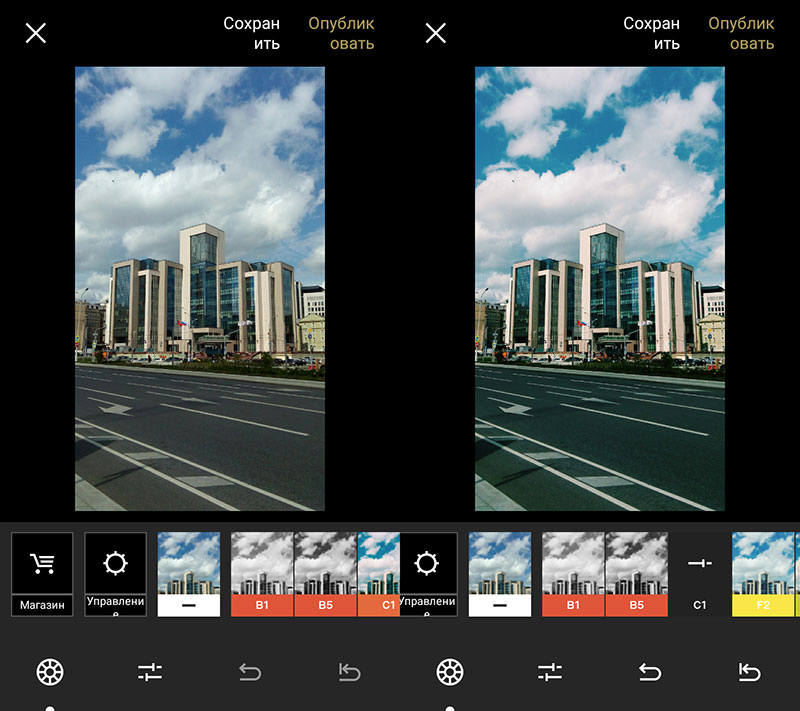
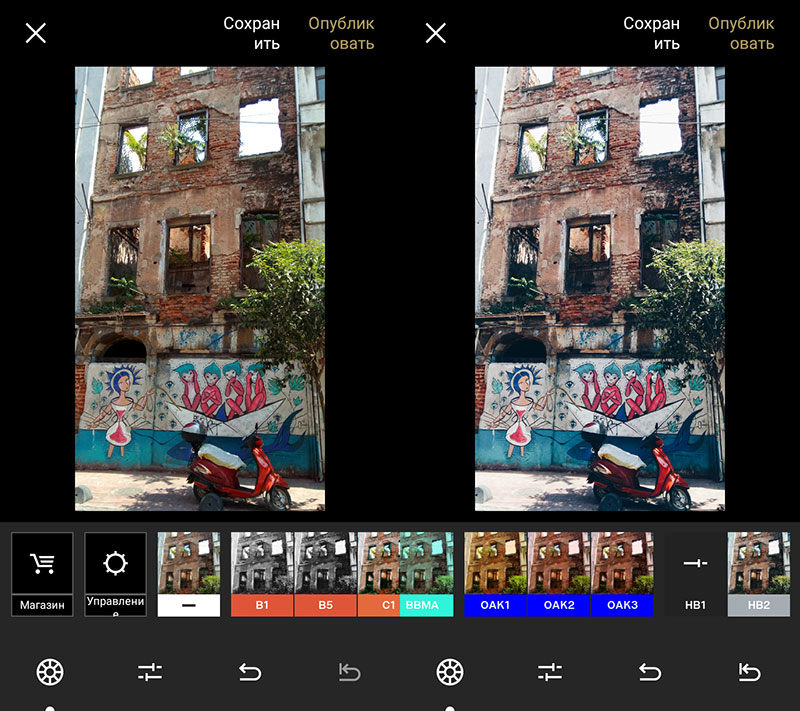
Alina Zaitseva talks about her favorite VSCO filters and how use them
VSCO filters – what is it?
VSCO filters (A5, A7, B1, B5, C1—) give cool effects and transform your photo. Therefore, I advise you to test everything free and paid VSCO filters and choose the ones suitable for Your Instagram style. Please note that filters are not must be set to 100%. How to use them? Press on the selected VSCO filter and you will see a slider at the bottom screen. Move it left or right to decrease or increase the filter effect.
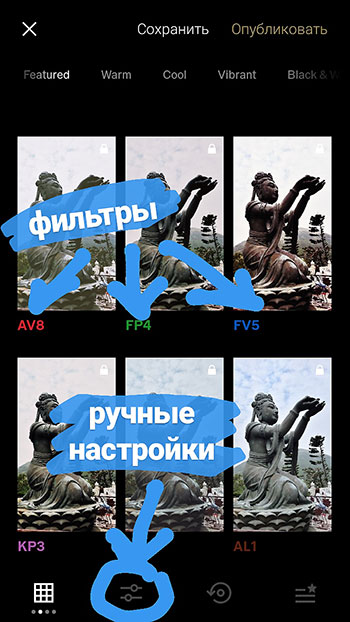
Very often it’s the filter that makes the gallery on Instagram homogeneous and stylish. Therefore, so that your photos are in the same style – use the same or similar VSCO filters when processing a photo.
VSCO A4 Filter
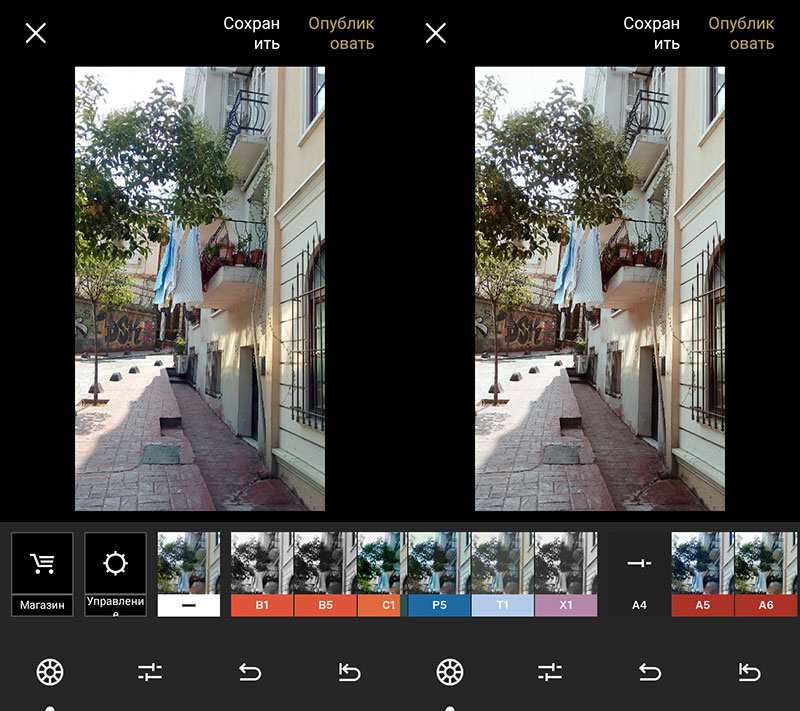
VSCO A5 Filter
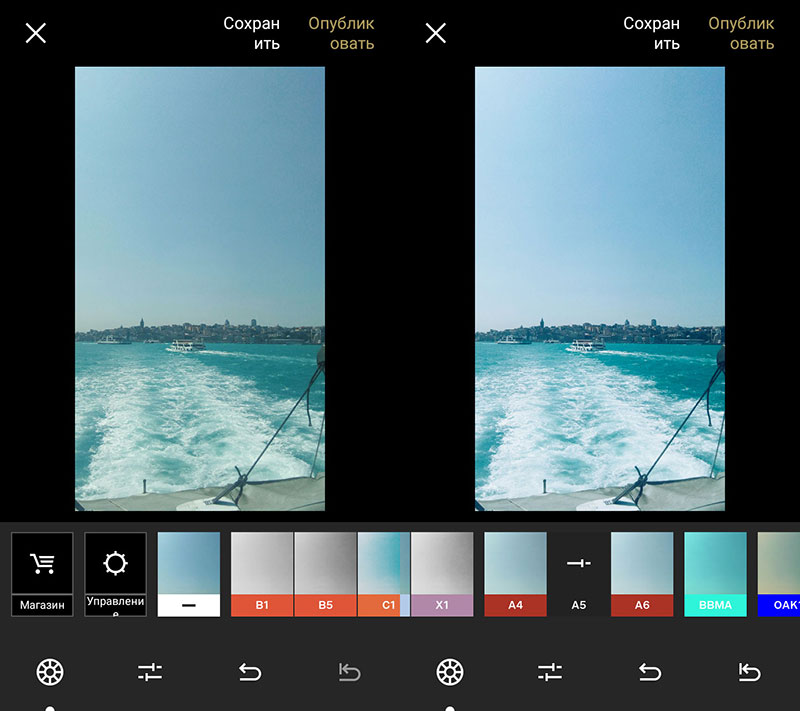
VSCO A6 Filter
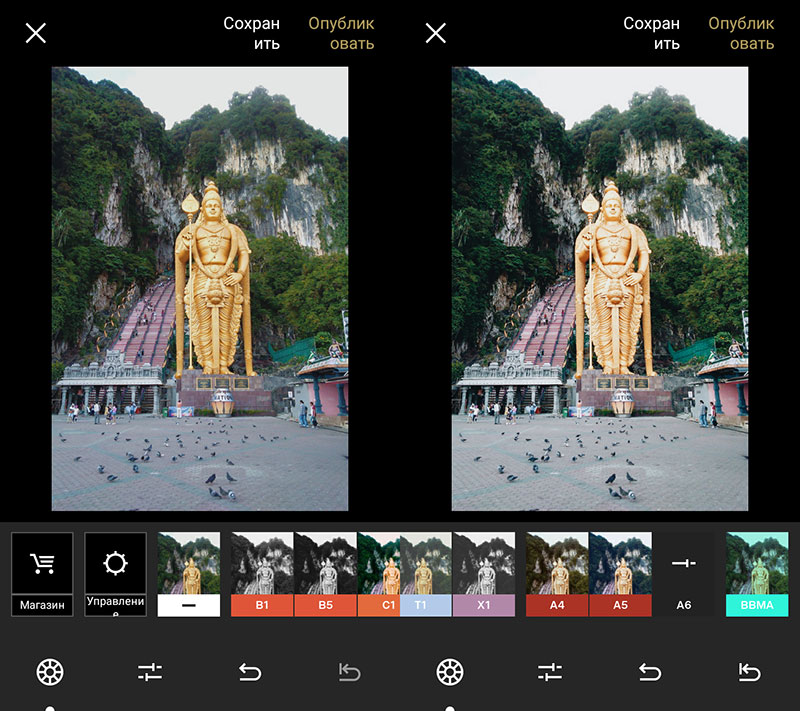
VSCO C1 Filter
VSCO HB1 Filter
VSCO: how to use the settings
 VSCO:Exposition
The first setting is shutter speed (exposure). Drag and drop slider to the right – the photo is lighter, to the left – the photo is darker.
VSCO: Contrast
Contrast is a tool that will make bright patches are lighter, and dark is darker. As a result, you increase contrast between light and dark in the photo. Usually contrast need to increase a little. But if you reduce it, you get more soft photo.
VSCO: Straighten
Using “align” you can twist the photo and get rid of littered horizon, and also make the direction of the boards parallel to the edge of the photo (the direction of the boards should always be parallel to the edge of the picture or at an angle of 45 degrees).

VSCO: Tilt Horizontal / Vertical
The horizontal / vertical tilt tool helps stretch the littered sides of the photo up or vice versa down.
Suitable for architecture shots when you were shooting buildings while standing from below.
VSCO: Sharpness
For each photo, except for portraits, it is better to add sharpness. After compression on Instagram large photos look blurry, so sharpness not prevent.

VSCO: Saturation
To make the sky bluer, grass greener, etc. – pull slider to the right. If you want a monochrome photo (calm tones), drag the slider to the left.
VSCO: Light and dark areas (Highlight, Shadows)
It happens that the white areas in the photo look too white, so that hurts the eye. Drag the tool slider to the right “light areas” and white will become softer.
“Dark areas” removes deep shadows in the photo. But if too drag the slider to the right, you can lose saturation black and it will turn gray. Therefore, use this setting neatly.
VSCO: Temperature
Sometimes the colors in the photo turn out to be too warm and I want to make them neutral. Then drag the slider to the left. AND on the contrary, in a photo with cold colors we drag the slider to the right and they become warmer (redder and yellower). By increasing the temperature, you can make a more “comfortable” photo. And you can reduce the temperature for a photo urban architecture (business quarters), sea, window shots airplane (especially over the sea).

Hue
Pull to the left – add a green tint, to the right – purple. Useful to correct the hue (sometimes obtained when artificial lighting). Or just to take a photo necessary.
Flesh color
Skin color is a tool for correcting skin tone. Ideal for portraits. Right – add a green tint (if the face is too red), to the left is red (if the face is too yellow on the picture)
Vignette
Darkens the edges of the photo. Helps draw attention to the central parts.

Grain
Useful feature if you need to add a little “imperfection” in the photo so that it does not look too “magazine”. Life hack for processed selfies: so that the photo does not look clearly blurred (smooth skin), add a little grain on top.
Discoloration
Highlights shadows and gives the photo a vintage look.
Light shadows
With this VSCO tool, you can add any shade to the shadows on a photo. Press the selected color a second time and you can adjust intensity.
Light highlight
The same thing, just apply a shade to the light areas a photo.
How to use VSCO settings correctly
With VSCO settings and filters, you can achieve almost any effect on the photo. The best way to learn is as much as possible. experiment. With each filter / tool drag intensity slider left and right, see how it turns out the effect. So you will begin to understand how to make the effect you need.
But do not forget that with processing – the less, the better. Not you need to apply a filter, twist the brightness and contrast to 100%, and Then apply a shade. It’s like with makeup – you need emphasize the merits, perhaps add some unusual item, and not use all cosmetics at the same time.
VSCO is free. But to get extra filters or presets (group of settings for different effects) – you need buy them on the AppStore or Google Play.