The content of the article:
- 1 You cannot create a home group – the essence and causes of the problem
- 2 How to fix the error “Windows cannot configure the home group on PC ”
- 2.1 Method number 1. Activate the necessary services
- 2.2 Method number 2. Provide the “Local Service” required rights.
- 2.3 Method number 3. Delete the idstore.sst file
- 2.4 Method number 4. Enable IPv6
- 3 Conclusion
- You cannot create a home group – the essence and causes of the problem
- How to Fix Windows Error Cannot Configure Home group on PC ”
- Method number 1. Activate the necessary services
- Method number 2. Grant “Local Service” the necessary rights.
- Method number 3. Delete the idstore.sst file
- Method number 4. Enable IPv6
- Conclusion
You cannot create a home group – the essence and causes of the problem
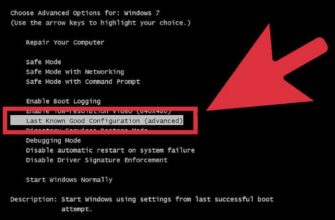
This error usually occurs when the user tries to create a new one (less often – connect to an existing one) home group. When you click on the create group button in Windows the system displays a message about the impossibility of setting up a home group on this pc. If the user turns to the tool for help troubleshooting, then this tool usually does not find on computer any problems.
Factors for the occurrence of this problem can be:
- Dysfunction of various system services in any way related “PNRP”;
- Problems accessing or running idstore.sst file, Responsible for storing certificate store data
- IPv6 protocol is disabled, the functionality of which can be used in the work of the home team.
How to Fix Windows Error Cannot Configure Home group on PC ”
Let’s look at ways to solve the configuration problem. homegroup on your PC. I recommend using display hidden system files in your explorer or file manager, since without them you simply won’t see some of what we need, directory.
Method number 1. Activate the necessary services
Follow the path:

and delete all contents of this folder and reboot a computer.
Then click on Win + R, in the search bar type services.msc, and press enter. In the window that opens system services find services:

And sequentially, as indicated in this list, run manually each of the specified services. Then restart your PC.

Activate all listed services
Method number 2. Grant “Local Service” the necessary rights.
Do the following:
Follow the path: 
- Find the “MachineKeys” directory there, hover over it, ” click RMB, and select “Properties”;
- In the window that opens, go to the “Security” tab, set the cursor to “All” and then select “Change”;

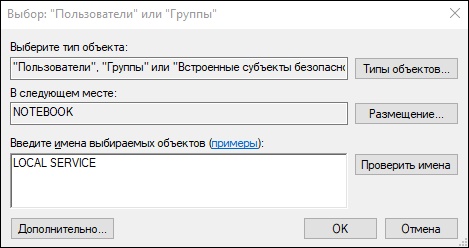
- If there is no “Local Service” in the list, click on the “Add” button;

- In the column for entering object names, enter “LOCAL SERVICE” and then click on “OK”;
- Under the “Allow” option, provide the “Local Service” full access;

- Reboot the PC;
- Then go to the “Services” window as described below, find there service “PNRP Protocol” and start it manually.
Method number 3. Delete the idstore.sst file
Run the command line with admin rights, type:


Enter this command
With this command you turn off the “Peer Networking Identity Manager”, implementing authentication function for Peer Name services Resolution Protocol “(PNRP) and Peer-to-Peer Grouping.”
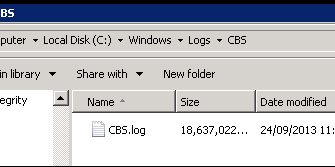
Then go along the path:

Find the idstore.sst file there and delete it. Reboot your PC.
Method number 4. Enable IPv6
- Press Win + R, enter ncpa.cpl there.
- In the network connections window that opens, select a connection by LAN, hover over it, click RMB, select “Properties”.
- In the list of components that opens, make sure that next to IPv6 component is ticked. If necessary, install checkmark and restart your computer.

Engage the specified component
Conclusion
The reason for the error “Windows cannot configure the homegroup to this computer “are usually a malfunction of services related to “PNRP”. It is recommended to use the items listed in the article. ways, this will get rid of the home configuration error groups on your PC.